Showing posts with label makeup. Show all posts

Sunday, November 28, 2010

F.A.B. Blog Hop: November 28


It's Sunday and time for the Fashion and Beauty Blogger's linkup!
I hope you all had a wonderful Thanksgiving Holiday and spent some time with family.

Add your blog to the list below and visit the blog of the person before you.
Please leave a comment after linking up!


Friday, September 17, 2010

Fall 2010 ‘COLORful Series’ Eyeshadow Tutorial #2 [smoky plum]


I know it's been a bit, but here's tutorial #2!! (click here to see #1)
Don't forget to take the quick poll in my right sidebar please!------>

snippit

Purple is by far one of my favorite colors to wear in the Fall; all shades of it!
This look is a basic smoky look using a deep plum color rather than black or brown. TRY IT! Next time you need a deep color opt for a deep plum or blue rather than black or brown and you’ll get a beautiful and rich depth. It’s also a fun way to use color without being it too bold or otherwise unwearable.


Easy, wearable makeup is what I love!

IMAG0396 IMAG0399

Step 1: Apply a light base on your eyelids. - You can use any eyeshadow primer that you normally use or a light colored cream eyeshadow in any form (pot or pencil).

Step 2: ALL OVER LID – The all-over lid color used is nude - matte color. USE AN EYESHADOW BRUSH TO COVER YOUR LID WITH THIS COLOR.

Step 3: INNER CREASE – The next color is a medium purple. USE AN EYESHADOW BLENDING BRUSH TO SWEEP THIS COLOR IN YOUR CREASE. BLEND WELL AND BLEND INNER AND OUTER CORNERS OF EYE LID.
Step 3: OUTER CREASE/ OUTER ‘V’ – The next color is a dark plum. USE AN EYESHADOW BLENDING BRUSH TO SWEEP THIS COLOR IN YOUR CREASE. BLEND WELL AND BLEND INNER AND OUTER CORNERS OF EYE LID.

Step 4: HIGHLIGHT – Use a light white or cream colored shadow as your highlight color. USE YOUR BLENDING BRUSH TO APPLY YOUR HIGHLIGHT COLOR ACROSS  YOUR BROW BONE AND BLEND WELL.

Step 5: LINER – I used black eyeliner on the outer half of my lower waterline & upper lash line.


USE A SMALL SMUDGE BRUSH OR SHADOW BRUSH TO APPLY THE DEEP PLUM COLOR BELOW YOUR LOWER LASH LINE. (helps create depth of the eyes and hide any darkness under your eyes!)


Step 6: MASCARA – It’s your look’s finishing touch! Apply some mascara to both upper and lower lashes and you’re all done!


Sunday, August 29, 2010

Fall 2010 ‘COLORful Series’ Eyeshadow Tutorial


Hello makeup addicts!
I’m finally doing my first eye makeup tutorial! I have been wanting to do this for quite a while and finally just jumped in!

Please let me know if I don’t describe things in an easily understandable manner.

This is the first of my Fall 2010 ‘COLORful Series’…since this Fall’s eye makeup trend is bold beautiful color!


Incorporating color to your daily eye makeup look doesn’t have to be overwhelming and I thought this look would be a great place to start. The looks in this series are all 'wearable' eye makeup looks! Some may be more appropriate for evening but none will be too overwhelming.


This tutorial (as well as the rest in this series) will be what’s known as “Use What You Have” tutorials. I will not be naming each product used, I will rather describe to you the color and texture and it’s up to you to use what you already have in your makeup collection that is similar.


I haven’t picked a name for this look, so if you have an idea please leave it in the comments! You can also ask me for any specific product name in the comments.


fallcolorseye1

Step 1: Apply a light base on your eyelids. - You can use any eyeshadow primer that you normally use or a light colored cream eyeshadow in any form (pot or pencil).


Step 2: ALL OVER LID – The all-over lid color used is an orangey bronze color. The color I used is a velvety sheen, not a glitter but feel free to use whatever textures/finishes of eyeshadow that you prefer. USE AN EYESHADOW BRUSH TO COVER YOUR LID WITH THIS COLOR.


Step 3: FULL CREASE – The next color is a deep plummy (purple-ish) brown. If you have a deep purple color, that would be ideal. USE AN EYESHADOW BLENDING BRUSH TO SWEEP THIS COLOR IN YOUR CREASE. BLEND WELL AND BLEND INNER AND OUTER CORNERS OF EYE LID.


Step 4: HIGHLIGHT – Use a light white or cream colored shadow as your highlight color. USE YOUR BLENDING BRUSH TO APPLY YOUR HIGHLIGHT COLOR ACROSS  YOUR BROW BONE AND BLEND WELL.


Step 5: LINER – I used sliver eyeliner on my lower waterline & very carefully lined just below my lower lashes with the same orangey/bronze that I used on my lids. USE A SMALL SMUDGE BRUSH OR SHADOW BRUSH TO APPLY THE 1ST ORANGE COLOR BELOW YOUR LOWER LASH LINE.


Step 6: MASCARA – It’s your look’s finishing touch! Apply some mascara to both upper and lower lashes and you’re all done!


Hope you enjoyed! If you try out any of my tutorials I'd love to see a picture! 
Tweet it to me @GotMyBenz

Saturday, August 28, 2010

Hard Candy Cosmetics REVIEW


this review is part of the Cool for School blog bash

HardCandy_Logo


If you’re a regular reader of my blog you know how much of a makeup addict I am. When I contacted Hard Candy Cosmetics for this review, I was thrilled to hear back from them so quickly!


Trying out a new makeup line can sometimes be daunting, but Hard Candy cosmetics has something for everyone!


Hard Candy cosmetics makes a variety of products from eye shadow and eye liner to lip color and nail polish. Their products are sold exclusively at Wal-Mart stores and with the average product cost as $6, Hard Candy cosmetics are super affordable!


I was sent the following products for review:


 hcglamazon
Visibly Wet glossy lip pencil in the color Glamazon. The oversized lip pencil is a great addition to any makeup bag, especially on the go! The Visibly Wet pencil is a creamy, sheen color that is wonderful for everyday.


hcnail1
Just Nails nail color in Date Night. This nail color is rose pink color that is all glitter, which to be honest I have never tried. I am pleased to say I quite like the glitter nail polish! It’s subtle and pretty. (I used it over top another pink color)


hceye7
Take Me Out Liner eyeliner in Bullet. This silver eyeliner glides on easily, blends well and the color is very bold and vibrant. Honestly it’s been years since I bought anything other than black liner so I look forward to incorporating this eyeliner into some fun looks!


My favorite product from the Hard Candy line is their eye shadow duos. (I wasn’t sent any for review, but have purchased one for myself in the past.) Their highly pigmented shadows are great both wet or dry, and are available in several great color combinations.


Interested in learning more? Check out hard candy online, they’re connected!


Twitter: @hereshardcandy
Facebook: HARD CANDY
Web: www.hardcandy.com and www.walmart.com


I RECEIVED PRODUCTS FROM HARD CANDY COSMETICS FREE OF CHARGE IN ORDER TO REVIEW THEM AND SHARE MY OPINION WITH YOU. MY OPINIONS ARE 100% MY OWN AND ARE IN NO WAY INFLUENCED BY THE COMPANY. FOR MORE INFO ON MY PR and REVIEW POLICIES CLICK HERE.

Monday, July 12, 2010

Orglamix Cosmetics Review & Giveaway


I was absolutely thrilled at the opportunity to review Orglamix Cosmetics!
Finding inexpensive makeup that one likes is always a process, and if you're looking...I have found a glorious solution! Orlamix cosmetics are not only inexpensive, but excellent quality as well! 


Cheri clearly knows how to keep her customers loyal to Orglamix with this guarantee:


Zero Synthetic Ingredients: Orglamix products are proudly formulated without: nano particles, bismuth oxychloride, synthetic dyes, petrochemicals or parabens. PETA approved. I GUARANTEE you will LOVE Orglamix, or your MONEY back.


I personally have been very impressed with Orglamix.


Blue

Pomegranate


I ordered the 2 eye colors above & both eye shadows have been a great hit! I've used them alone and combined them with other colors to create rich, bold looks. 


Roze Quartz (Mineral Glow)
The mineral glow is my new favorite product! For so long I have been searching for something like this...I had a more expensive product before that was similar but overall I cannot get enough of the mineral glow! It's a beatifully sheer golden color that I use as a highlight on my face and I brush a little along my collar bones & chest area when I'm wearing something open & it gives me a gorgeous all day glow!


Win It:

1 lucky lady will win 3 products of her choice from Orglamix pure organic mineral eye, blush, glow, foundation or color corrector!

[contest ends July 26, 2010 @ 12midnight PST]

#1. Visit the Orglamix shop & let me know what 3 products you'd want to win. (heart them on the store & comment with the colors here on my blog) - MANDATORY 1 entry

#2. Follow Orglamix on Twitter & follow Me on Twitter tweet the following: 
"I am entered to win 100% natural mineral makeup from Orglamix cosmetics! @hautebeauty @gotmybenz http://bit.ly/c9BQIb #orglamix" - 1entry each follow [+1 bonus entry per daily tweet & leave the url]

#3. Subscribe to my blog via RSS - 2 entries

#4. Subscribe to the Orglamix beauty blog via e-mail - 2 entries

#5. Become a FAN of Orglamix on Facebook - 2 entries

#6. Leave a comment on a non-review post on my blog & let me know in the comments - 2 entires

So many ways to enter & WIN! -- Good luck my lovelies!


Please leave a separate comment for each entry & don't forget to leave your email or profile info so I can notify you if you win. Good luck!

The winners will be selected via random.org and announced here as well as on Twitter & contacted via email. The winners will have 48 hours to contact me or a new winner will be selected.


*I was sent three products from Orglamix free of charge so that I may try and share my opinions with you. This in no way affected my review. For more information on PR policies click here.


Sunday, April 25, 2010

Workplace Makeup (Top 5)


Don't Over Do It!
At the risk of looking like 'Mimi', it's important to keep workplace makeup light! Wearing too much makeup during the day is generally a 'faux-pas', but especially in the workplace you want to maintain a clean & fresh look that is easily maintained throughout your day!
#1- Your Canvas
Make sure you follow a daily cleansing and moisturizing routine! It is important to keep your skin cleansed, ex foliated and above all moisturized!

#2- Prime
Always prep your face for concealer and foundation (if you use them) with a primer. Depending on your skin type, below are a few of my personal favorites.

#3- Facing The Basics
If you're like me, you use concealer & foundation to even out your skin.

For those of you blessed with perfect skin...(grrrrr) skip along to eyes ;)

*Concealer- make sure you pick a color that is slightly darker than your foundation! This is important because if you pick a shade that is too light, you may not get the coverage you need and it may not blend well. Also, if your shades match exactly your dark circles will still look dark! By getting a slightly darker shade, you can blend your foundation in more evenly. You can also buy undereye concealer in a yellow shade (as opposed to a flesh tone), or with yellow undertones, because yellow covers the purplish hue of some under eye circles.

*Foundation- Keep it light! Don't 'cake' it on during the day...here's how to get the coverage you want without going overboard!

The #1 rule to good skin care and makeup is knowing your skin type!

People with oily skin should use powdered foundations. Whether loose or pressed, the powder absorbs the oils from your skin whereas liquid foundation sits on the skin & tends to clog the pores of people with oily skin. When applying powder foundation, use a large kabuki-type brush and apply in large, upward, circular motions lightly all over your face. The great thing about powder foundation is that you can build up coverage evenly by applying light 'layers'. Be sure you blend well!

For normal, dry & combination skin, if liquid foundation gives you the coverage you want by all means continue to use it! I recommend that you apply liquid foundation with a foundation brush rather than a sponge. In general, (if you wash them regularly) brushes are more hygienic than sponges & using a foundation brush allows you to 'paint your perfect face'! The coverage is flawless, and once you've applied it with the brush you can go over it with a sponge to blend and then a large kabuki-type brush! Make sure you change your sponges regularly!
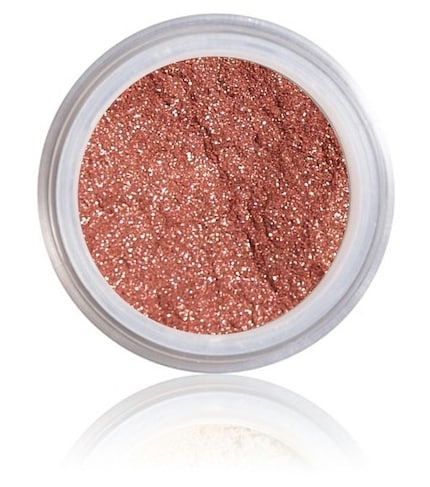
#4- Get Cheeky!

Remembering to keep it simple, finding a daytime blush can be tough. Be sure you find a color that is light and complementary to your skin undertone.

Bright red cheeks won't cut it at the workplace!

As always, using a large brush with powder blush is excellent because it allows you more 'freedom' to blend! Apply it with large, upward, round strokes from the apples of your cheeks to the outer corner of your eye. And then....blend!


#5-The Eyes Have It!

Keeping the eyes bright and beautiful is easy! I recommend you always use some sort of eyelid primer to get the longest and best looking wear from your eyeshadow! Stay with light neutral colors and maybe be daring with a smoky eye! You can do the smoky eye in a brown or purple so that it's less dramatic.

What are your favorite workplace beauty tips??